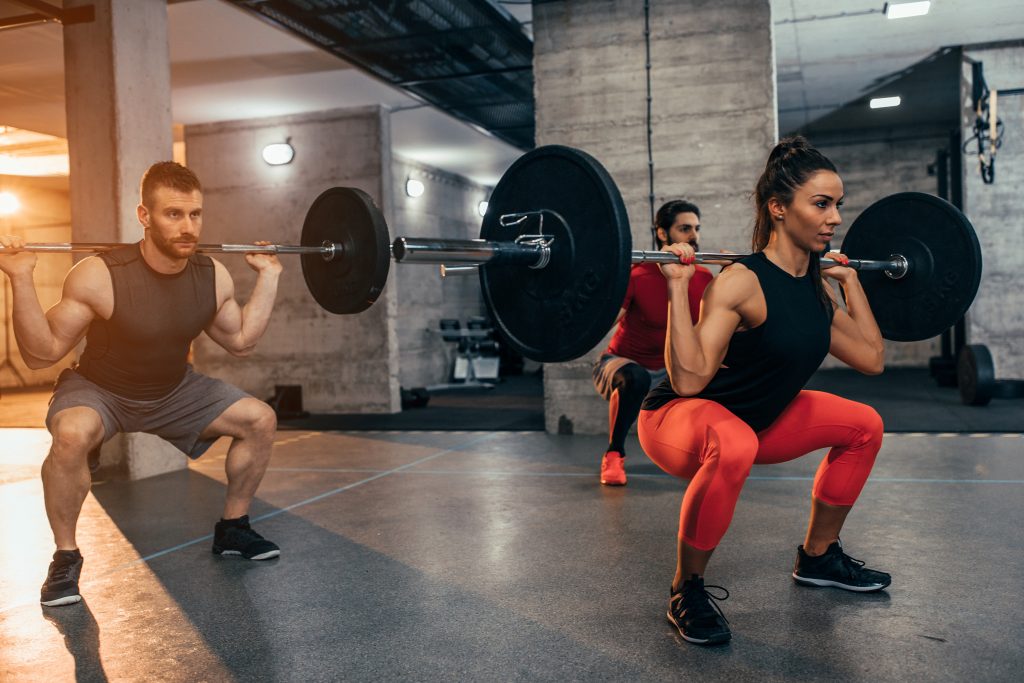
The squat is probably the most well-known exercise for anyone in or out of a gym. It’s one of the most beneficial exercises when it comes to improving strength, energy usage, and body composition changes (Robergs et al., 2007, Gonzalez et al., 2017, Beardsley S&C Research). But many don’t get these benefits as they do not know how to do a squat properly.

Why Many People Can’t Squat
For any decent PT or strength and conditioning (S&C) coach, the squat is a useful assessment exercise. It helps a coach to see any weaknesses in your movement through the posterior chain** (Myer et al., 2014). In sport, the back squat can be used to asses performance markers such as neuromuscular control, power, strength, stability and mobility in the posterior chain (Myers et al., 2008, Seitz et al., 2014, Cormie et al., 2007, Seo et al., 2012, Fletcher & Bagley 2014, Clark & Lucett 2010).
* The posterior chain is the group of muscles down the back of your body, from your heels and calves, up to your rear delts and traps.
Athletes usually have an S&C coach that will teach and monitor their squat to make sure they get the most out of it. Unfortunately for the average Jane and Joe, unless you get a PT or a coach, then it’s unlikely you will be taught how to do a squat properly from the start.
From years in the industry, there’s also a growing trend of PTs that don’t seem to know how to teach the movement correctly either. So getting good help can sometimes be tough!
How to Do a Squat Properly
This post will give you all the initial teaching points for how to do a squat properly. We will go through the basics to get your squat moving as it should. Even if you’ve been squatting for a while, the following progressions are an easy way to test your movement. They are the very basic building blocks of a squat. If you can’t perform the movement to the correct depth, it’s unlikely you will be squatting correctly.
This article covers the exact steps I’ve used and tested with everyone from international athletes, to full knee reconstruction patients, to cancer patients, and they work. However, they are definitely not the only methods you can use. Coaches may use different progressions and many of these work just as well.
So let’s get into it!
The Importance of Depth and Range of Motion
Before we look at any exercises, there are a few things worth knowing when it comes to how to do a squat properly.
Firstly, the range of motion is critical! To get the most out of the squat, you need a good range of motion. So this is what the main focus of progression exercises are when I work with anyone. First, we get you hitting a good depth. After this, foot position and knee angles can be modified to perfect your squat.

When squatting, quarter reps and half reps are typical in local gyms. This is because of anything from lack of flexibility, to lack of technique, to the ego! When you squat properly, it’s likely that you’ll drop weight initially. But you’ll progress in both your squat and overall strength much faster when you get it right (Bloomquist et al., 2012).
Movement should always be more important than weight. When you stop worrying whether you’ve squatted low enough, and you know you can’t get any lower, this is your cue to start focusing on bumping those weights up. Until then, take your time and get the technique right!
Squat Progressions
These progressions are based on building through the exercises over a few sessions. These are the fundamentals of working a full range of motion and getting the control right. So take your time and practice these a few times, you’ll be thankful in the long run!
Also, usually I would get clients I work with to perform a back squat with a light bar. This is the first step in teaching them how to do a squat properly. I can then assess their movement to help with some personal tips straight off the bat. The advice I give usually helps with stance width and foot position as hip anatomy is different between individuals. Just play around with feet position to find what’s most comfortable as you go. Here are the basic progressions towards how to do a squat properly.
1. Box Sit-ups
These are the first steps for teaching any able-bodied person how to do a squat properly.
This exercise allows you to get used to the movement. Box sit-ups only require you to work with the weight of your own body, before adding more weight. There are a couple of regressions to this for those who may have knee injuries or back problems. But, for a healthy person, these work great. If you do have injuries that cause pain or issues in the movement, I would advise working with someone qualified first. This will minimise the risk of further damage.
Performing a Box Sit-Up
For this exercise, you need a box step or equivalent, which most commercial gyms should have. Now, although this exercise looks very simple, to do it correctly is surprisingly difficult at first. This is one of the first steps in how to do a squat properly.
The height of the box is important. You want to start with a box no higher than just under the crease at the back of your knees. Using an adjustable step, you can go high, low or tilted (one side up, one down). The tilt helps to gradually progress down the angle of the box or find a middle ground.
The Setup
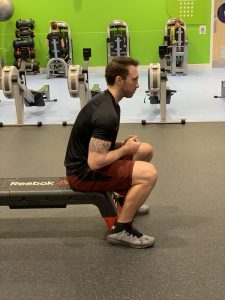
Place the box behind you, heels against it, legs at a comfortable width. From here, the exercise is simple. Sit on the box, keeping upright with your torso slightly forward, chest out and head facing forward. A narrow stance requires the most flexibility. Again, every person is different, so play around to find what most comfortable.
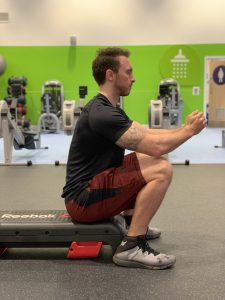
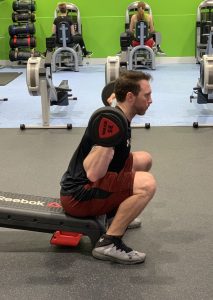
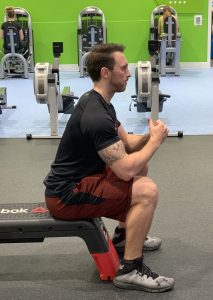
Don’t let your upper body slouch or roll forward. Focus on keeping your chest out. If in front of a mirror, you should be able to read the logo on your chest throughout. If you don’t have a t-shirt with a logo, focus on your sternum. Here’s an idea of what not to do:
The Concentric Phase
Now for the tricky part. Push your feet into the floor, as if trying to push it away to stand back up. While you do this, keep your upper body in the same position as you started. To make sure you are using the correct muscles and have a strong base, ensure you are pushing through the heel of the foot. Lift the big toe to the roof of your shoe.
This can be harder than you might think! To help, initially, use a little forward swing from your torso. The aim is to reduce this as much as possible over time.

The Eccentric Phase
When you are at the top of the position, you now want to squat back down to the box. Keep your upper body as mentioned before and ensure your heels stay in contact with the floor (remember the big toe lift to help). Try to control your depth for as low as you can go until you feel you reach your limit. At this point, let yourself drop down to sit on the box and repeat the movement.
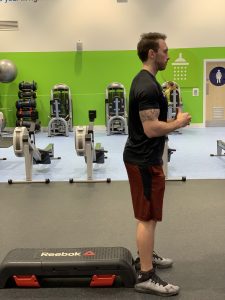
Over time, you should find you can get closer to the box on the way down. Also, the push upwards should feel more comfortable. Keep practicing! Aim to do between 3-4 sets of 5-12 reps, depending on how strong you are with your body weight. When you’ve mastered doing it on a higher level on the box, you can play around by lowering it to challenge yourself further. Every time you practice, you’re closer to learning how to do a squat rm properly.
The “Push the Floor Away” Cue
There’s a reason for thinking about pushing the floor away while standing up. This simple trick helps you keep your chest up while engaging the leg muscles correctly.
When getting up, people usually pull at their back rather than engage the legs and Erector Spinae properly. This is especially true if they are weak at the bottom position of the movement! When people do this, they can look like they are dancing. Their hips shoot up first by straightening the legs. This is followed by a secondary movement of the upper body coming up to the upright position afterward. This is not what we want when learning how to do a squat properly!
2. Counterbalance Box squats
This is the second progression. It helps you get the correct balance throughout the movement, aided by weights. You can practice this alongside the box sit-up in the same session.
Performing the Box Squat
For this, you will need the box again and a set of dumbbells. Start light, then you can progress based on getting comfortable with the movement. With this exercise, the clue is in the name. Weights are used as a counterbalance. If you are struggling with being able to lower yourself all the way down during box sit-ups, these should make that easier. Mastering this aspect of the box sit-ups is a vital part of learning how to squat properly.
So let’s move on to the exercise.
The Set Up
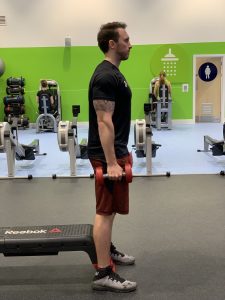
Prepare your starting position in front of the box as you would for the box sit-ups. This time though, stand up. Hold one dumbbell in each hand, to the side of your body. Ensure that you keep upright, with the head facing forward and chest high.
The Eccentric Phase
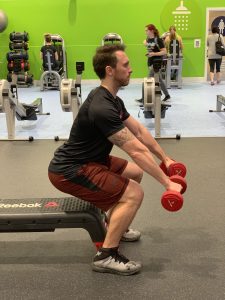
From this position, begin to squat down, as you do so, gently raise the dumbbells forward to act as a counterbalance.
You aren’t trying to lift the dumbbells up to shoulder height. You only need to lift them enough to counter the weight so that you keep your weight through the heels and the posterior chain. Lower yourself all the way down, so that you sit on the box once again.
The Concentric Phase
From here, you will aim to do the same movement as in the box sit-ups. Push the floor away through the heels, to stand back up.
This time though, the benefit is that you can lift the weights in front of yourself as a counterbalance. This is to be able to lean your weight back onto your heels as you push the floor away. However, the concept is to perform the movement while keeping the dumbbells at your side. So, use them if need be, reduce how much you use them over time.
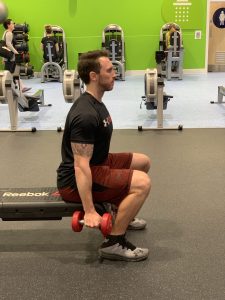
Box Squat Progressions
As you get the technique right, you can start to increase the weight. This helps strengthen the legs as you get your form right.
You might think you can’t go too heavy, in case you won’t be able to raise the weights back up. This is true. But here’s the thing. As the weights get heavier, the dumbells can stay closer. Remember they just act as a counterbalance. Squatting more than you can raise forward? Still can’t perform the exercise entirely using a barbell back squat technique? The focus should be getting that right. Not the weights! And be patient – remember, you’re still learning how to do a squat properly.
3. Barbell Box Squats
Ok, you’ve got the basics down. You’re a step closer to learning how to do a squat properly. Once you can push up from a proper depth for your squat, you can progress onto barbell box squats. This is usually the last progression to learn how to do a squat properly. This is an important step. This exercise helps you reach the most beneficial depth to increase muscle activation and strength (Clark et al. 2012).
Performing the Barbell Box Squat
To begin this exercise, you will need the box again and a barbell. Aim for the lightest bar you can lift. As you become more comfortable with the movement, you can increase the load. Place the bar on your back and stand in front of the box as you have for the previous exercises.
The Set Up
The Set Up – Prepare your starting position in front of the box as you would for the counterbalance squat. Place the bar on your back (play around with how high or low up your back based on comfort) and ensure that you keep upright, with the head facing forward and chest high.

The Eccentric Phase
With the shoulders pulled back, keep head and chest facing straight ahead. Remember to look for your logo on your T-shirt in the mirror. This is how to check you’re upright! Keep the weight on the heels and lower yourself down. Keep the tension throughout until you have sat down on the box.
The Concentric Phase
From here, do the same movement as the other two exercises. Push the floor away through the heels, to stand back up. Again, keep focused on head and chest upright, facing forward.
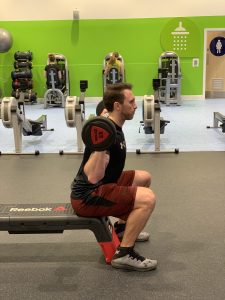

Barbell Box Squats: Useful Tips
This is a key exercise to get right. It’s the last progression in learning how to squat properly. To get the most out of this movement, here are some added tips.
- Find your most comfortable foot width. Play with feet angles as well. They can either be straight ahead or slightly rotated outwards. How far depends on your own comfort and movement.
- Keep your heels on the floor. Try to push it away through the heels as you return to standing position.
- Don’t roll onto the ball of your foot to push up.
- Chest high and back flat, look for that logo! Even with the torso leaning slightly further forward, you should still be able to see your chest in the mirror.
- When you reach the box, focus on activating and keeping tension in the muscles. If you keep relaxing on the box, you will find it challenging to learn how to do a squat properly. This is because you won’t be able to keep the tension in the correct posture throughout your posterior chain.
- Experiment with box height as you get comfortable with depth. This improves your range of motion. 90 degrees is a good range with heavier weights.
And Now You Can Do a Squat Properly!
From here, you should now know how to do a squat properly. Keep playing around with feet position to find what’s most comfortable for you.
Enjoyed learning to squat? Why not build these exercises into a workout regime? Read about the essential elements of a workout plan here. Squats require good mobility. Learn about the importance of mobility training here.
